


Do you know how to connect your eARC soundbar to your TV? The good news is that it’s pretty simple, as long as you have the right cables for your devices. Soon you’ll be able to enjoy the premium sound that only eARC soundbars can offer.
Before we walk through how to set up your eARC soundbar, let’s review why this was such a great purchase in the first place, and what you’ll need to have to ensure that everything works.
What is eARC?
eARC stands for Enhanced Audio Return Channel. It’s an upgrade from its predecessor, ARC. eARC is an advanced feature of HDMI 2.1 connection that allows sending and receiving of audio from an audio source to an audio receiver (like from your TV to your soundbar), at a much faster rate than HDMI 2.0’s ARC.
One common issue with ARC connections is 5.1 audio. If you’re watching a movie through your Blu-ray player or online streaming site that streams 5.1 audio, but your TV doesn’t have a 5.1 passthrough feature, your soundbar will still be receiving 2.0 audio since it cannot transmit 5.1 audio.
This means that a great amount of quality will be lost if your TV doesn’t have this feature. This compatibility issue has been fixed with eARC’s technology upgrades. Through eARC, it’s now possible for older TV models without a 5.1 passthrough feature to transmit high-fidelity audio formats.
How different is eARC from ARC?
The main difference between eARC and ARC is the bandwidth. The HDMI ARC technology is implemented in HDMI 2.0 and can support a total bandwidth of 18 GBPS. On the other hand, the eARC feature is implemented in HDMI 2.1 and can support a total bandwidth of 48 GBPS. eARC allows you to transmit audio from your TV to your soundbar with very high quality.
What is eARC soundbar?
An eARC soundbar is basically a soundbar with eARC connection. This type of connection allows your soundbar to receive high bitrate formats such as Dolby® TrueHD, Dolby Atmos®, DTS-HD Master Audio™, and DTS:X®. In short, having a TV and a soundbar interconnect with an eARC transforms your home into a home theater.
With a larger bandwidth as compared to ARC connections, you’ll be able to hear a more complete, vibrant, and resonant sound. With eARC, you’ll hear your favorite songs like never before and watch movies in a totally new and more immersive way.
How to setup eARC soundbar
Connecting eARC soundbar to a TV isn’t that hard, especially if your TV and soundbar can readily support the eARC connection. Simply follow the steps below and soon you’ll be able to listen to that high-quality audio you’ve been craving.
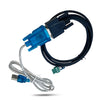
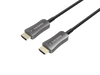
- For safety purposes, make sure that both your eARC soundbar and TV are powered off. Next, prepare your ultra high-speed HDMI 2.1 cable.
- Position your soundbar in your preferred area. Here are a few tips for proper soundbar placement.
- Remember, the best position for your soundbar is at ear level. You could place it above or below your TV, however, the most common area for a soundbar is below.
- Do not place your soundbar behind your TV as this obstructs sound waves, causing a decline in sound quality.
- If your soundbar has an upward-firing speaker, avoid placing it directly below your TV as well.
- For soundbars with side-firing speakers, make sure there’s nothing on its sides that can block the sound.
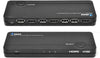
- Once you’re all set, connect your soundbar’s HDMI eARC-supported port to your TV’s eARC port with your ultra high-speed HDMI cable. This step pretty much does most of the job. If your TV doesn’t have a marking for an eARC-supported port, you may try inserting it into a regular HDMI input port. If you have other audio or video sources you’d like to connect, like your Playstation, Xbox, or Blu-ray players, you may now connect them as well.
- It’s now time for you to power up your soundbar and TV. You might have to set up your TV for the eARC soundbar to become the primary audio output. Open your TV’s settings and navigate to the audio settings.
The audio settings menu varies depending on your TV’s brand and model, but commonly, you have to change the audio output to HDMI and set its output settings based on your preference. Some TVs directly include an eARC mode, all you have to do is put it on. For some TV models, you may bypass the TV’s speaker and directly use the eARC speakers as your main audio output.

Photo by Jako Janse van Rensburg, via Unsplash
Have issues with your eARC soundbar?
If you’re having issues with the sound that’s supposed to be coming from your soundbar, you may try the following steps.
- If you’ve already tried turning your TV and soundbar on and off and the soundbar still doesn’t connect properly, you may try changing the bitstream audio output settings on your TV from “PCM” to “Auto” or “Bitstream”. Most TVs set PCM as default; this automatically converts audio to 2.0.
- Once you’ve tried that and you’re still encountering the same problem, try checking your network especially if you’re streaming audio through an online site. If the signal is weak, consider using an ethernet connection from your internet router to your TV or soundbar.
- If the problem persists, you may want to try using a different HDMI 2.1 cable; and if that still doesn’t work, you may have to reach out to either your TV or soundbar’s manufacturer/distributor.
Another tip you may find useful is to double-check if you’re connected to an eARC-capable HDMI port, and also to check if your TV is eARC compatible.
We hope that this answers all your questions about how to connect eARC soundbars to your TV. And if you’re already set with your eARC soundbar, we hope you enjoy the new experience it brings to your movie nights and everyday watching experience. Make sure you check out other good tips on our blog for how to make installing HDMI electronics easier!
SHOP NOW!
